
Day 5: Holiday Art
If you’re like most homeowners, you probably have a box filled with mismatched garage sale frames hiding in your closet. But don’t feel shamed! Instead of letting them collect dust or giving them away, you can paint them to coordinate and form a gallery wall of holiday art!
We’ve partnered with COLORSHOT Premium Spray Paint to exemplify how you can upgrade an old frame into a beautiful piece using just two paint colors and a rag.
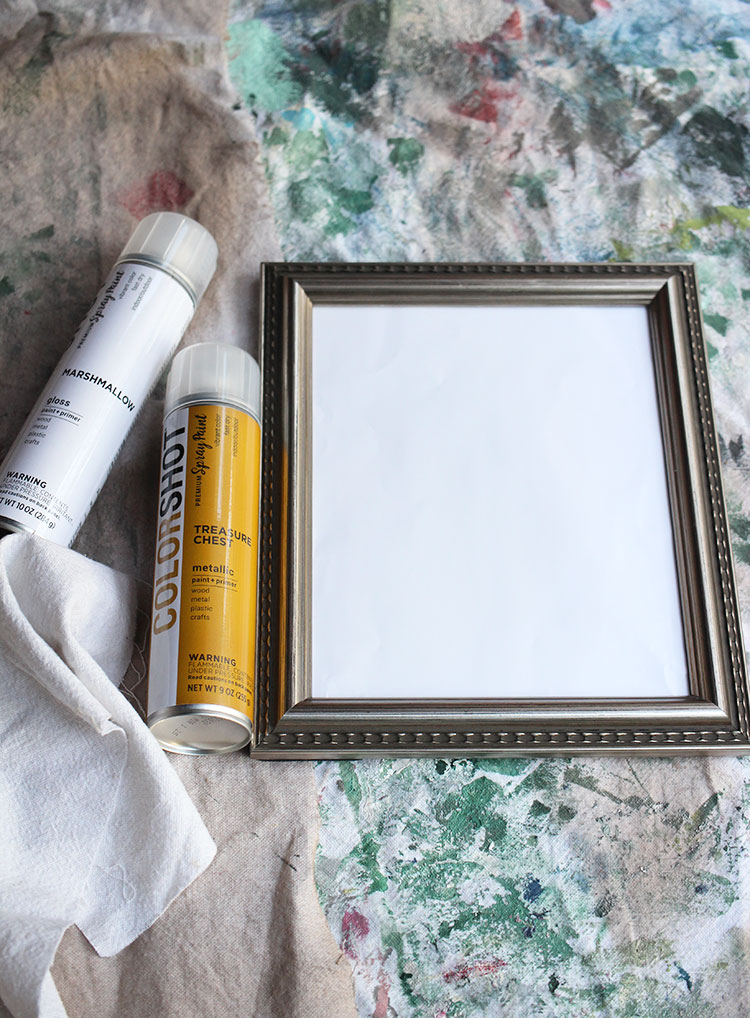
What You’ll Need
- A picture frame (preferably with raised details)
- COLORSHOT Premium Spray Paint in Treasure Chest
- COLORSHOT Premium Spray Paint in Marshmallow
- COLORSHOT Premium Spray Paint Clear Sealer Matte
- A lint-free cloth (we used drop cloth)
- Drop cloth or newspaper to protect the surface you’re spray painting on
Step 1: Prep Your Frame
Once you’ve covered your work surface with drop cloth, remove the glass from your picture frame. If it’s attached to the frame, cover the front side of the glass with a piece of paper or cloth. Ensure your cover material isn’t obstructing the frame itself.
If your frame came from a garage or estate sale (or if you’ve been keeping it in your closet for some time) make sure you’ve wiped off any dust or dirt that’s collected over time.

Step 2: Spray Away
Now you’re ready to paint! Choose which color you’d like as your base (we chose Treasure Chest) and spray on one coat. Allow to dry for one hour and spray on a second coat. Allow to dry.
Once your frame is thoroughly covered in your base coat, you’ll begin with your top coat (we chose Marshmallow). If you’re wet distressing your piece, it’s best to have your cloth ready so you can wipe off portions of this layer before it dries.
Start by spraying one side of the frame and make sure it gets into every nook and cranny. Immediately after, wrap a corner of the cloth around your index finger and gently run the cloth along the raised details of the frame to allow the base paint color to peek through. Repeat on the remaining three sides of the frame.
If your frame doesn’t have raised details, you can wait until the piece is completely dry and use sandpaper to distress it, but use a fine-grit sandpaper (200+) so you don’t accidentally sand off the base coat, too.

Step 3: Seal It
Once you’re happy with the look of your frame, use COLORSHOT Premium Spray Paint’s Clear Sealer Matte to protect it and made it last for many Christmases to come!
Lastly, choose the art piece you want to showcase inside your frame. If you like our “May Your Christmas be Shiny and Bright” art, you can sign up for our 7 Days of Christmas Crafts newsletter to have the free printable sent straight to your inbox!
For more inspiration on gallery wall ideas, click here.
If you didn’t see our post on a DIY no bake gingerbread village, get caught up here. And catch a glimpse of what’s next below!

Don’t forget to follow our Facebook, Instagram, and Pinterest for some fresh flea market inspiration!


